Flats Stalker 18

7. Jig Assembly

Home
Bill of Materials
1. The Strongback
2. The Pencil
3. Wood Butchering
4. Transom
5. Joining Panels
6. Round Chine Option
7. Jig Assembly
8. Stitching it all together
9. Tabbing & Filleting
10. Fiberglassing the Seams
11. Glassing the Hull Bottom
12. Fiberglassing the Sides
13. Fairing Slurry
14. Fairing - A Strategy
15. Fairing the Outside (Cont'd)
16. Skeg
17: Rubrails
18. Primer
19. Hull Flip
20. Inside Taping
21. Inside Cloth
22. Stringers & Knees
23. Installing Frames
24. Sole
25. Rod Holders
Photo Album
Contact Me

Jig Assembly (~ 6 hrs - one person)

The final step before actually building the boat - The Jig!

The base for the jig is the strongback (See Step One). The frames that will later be laminated inside the hull are called molds in this step of the process. The molds basically create a skeleton that the skin (plywood bottom and side panels) will be temporarily attached to so the shape of the hull can be created. Here's a rendering by Bateau.com of a more complicated jig system used on a larger boat...

finishedjig.jpg

The builder's notes that come with the plans 
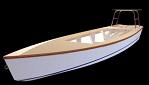
recommend using the deck sections as a base for the jig. I decided to mount the molds and transom directly to the strongback just like the illustration above.

The 1st night I cut and mounted all the vertical braces for the mold sections and the transom. Then I mounted the transom and used this component as the "origin" for the placement of all the molds on the strongback. It's key that the transom be level and at the correct height because all measurements are made from this component.

After the transom was solidly mounted to the strongback, I attached the "C" mold in position, leveled and squared the mold in relation to the baseline and transom. Next I placed "E" mold, then "D" mold, followed by the "B" & finally the "A" mold. I temporarily clamped the uprights to the strongback a checked all the conceivable dimensions and used a laser level to align the centerlines of the molds with the centerline of the transom. All this was a fairly tedious process and took quite a bit of time to make the small adjustments to insure every component was in proper alignment. I highly suggest doing this as a 2 person job. Not having someone hold the other end of the tape measure slows things down quite a bit.

molds1.jpg
 
molds2.jpg
 

The 2nd night involved, double checking all the measurements and then securing the mold uprights to the strongback with long decking screws so the molds won't move during the hull assembly step. I also discovered I needed to make the stringer slots a little deeper in the molds. A quick pass with the jig saw deepened the slots so the stringer bases wouldn't sit above the mold edges.

Here's a couple of shots of the jig with all the components on the strongback:

jig1.jpg
 
jig3.jpg
 

jig2.jpg