Once the taped seams are done, you have a
decision to make on whether to proceed with glassing the hull bottom. Base the decision on your level of confidence and how
much time you have ahead of you and factor in enough buffer in case things take longer than you expect. If you don't proceed,
you'll have to allow the epoxy on the tape to cure. If you wait more that about 18 hours, I would sand the tape to provide
a surface for a mechanical bond, since the better chemical bond becomes less likely the longer you wait. I decided to press on with laminating the
bottom cloth after taping the seams. This would provide a "wet on wet" chemical bond with the tape, cloth, & wood resulting
in the best strength. What I had planned on was about 6 hours to do the job alone. This was a large miscalculation on my part
since this part took closer to 10 hours. I finished at 4 am on a Sunday morning! I didn't have any help mixing batches of
epoxy, so stopping to make a new batch really adds a lot of time to the process. Ideally, a 3 person crew would be best. One
person rotating in to do the mixing, one person doing the initial application of a saturation coat, and then the 3rd person
following and removing the excess resin - Or two people applying and one mixing. If one person volunteers to do all the measuring
and mixing, then they should get to pick the beer brand and the dinner menu (make sure they pick before you start, or the
dinner may be the most expensive you've ever purchased)There's nothing magical about taking a 2"
chip brush, dipping or scooping up a glob of resin and slopping it on the fiberglass fabric. You'll get a pattern and style
established fairly quickly. I usually apply a fairly heavy coat and quickly move on to the next dry area until a good portion
of the batch is applied. After a minute or so, the resin will soak into the fabric giving it a uniform "wet" appearance. Then
I take a spreader and move the resin around the cloth to distribute and saturate the cloth evenly. You'll notice that it's
easier to apply the resin and move it around in one direction without disturbing the cloth too much. I found this was the
same direction as the top layer of glass threads.
Some people pour the resin onto the cloth
and spread it, others use a roller to get the cloth saturated. Try all the techniques and pick the one that works for you.
Working alone, I found I had decent control and timing of the pot life by using a disposable "chip" brush. Since the brush
is pretty much always being dipped in fresh resin, one or two brushes can be used for the entire hull. I poured the mixed
resin into a wide plastic Ziploc brand plastic "tupperware" container to hold it while I applied the resin. If you apply it
directly from a tall-sided mixing container be very careful that the resin doesn't "kick" early from the heat being generated
by the curing reaction. Spreading the resin out in a shallow pan allows the heat of reaction to dissipate and lengthens the
potlife over using a tall-sided container.
Back to laminating... I remove the excess
resin by using either a stiff spreader or a rubber spreader. This will scrape or pull the excess resin out of the cloth as
you press it against the panel. Try not to remove too much and starve the cloth. Usually if the cloth is turning white (as
opposed to relatively clear), you're removing too much resin. The stitching holding the fibers in place along the biaxial
cloth edges is a pain in the ass because it has a tendency to pull out, but you'll get used to it in short order. Have a pair
of cheap scissors handy. As you progress, check the "edge" (chines,
transom, etc) areas and transitions near tape edges for air bubbles. Gently work these out with you spreader using excess
resin and some finesse. Eliminating all of them will be impossible, but try to reduce them to no larger then a dime.
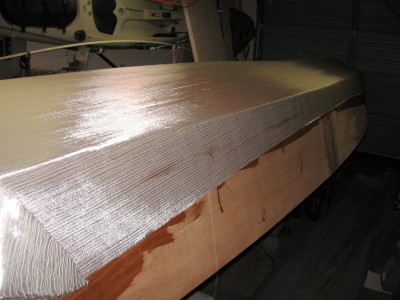
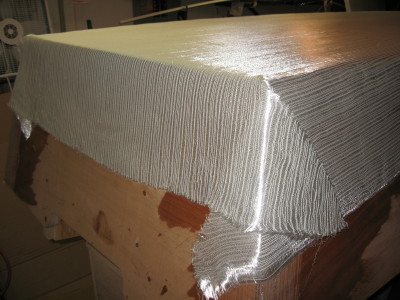
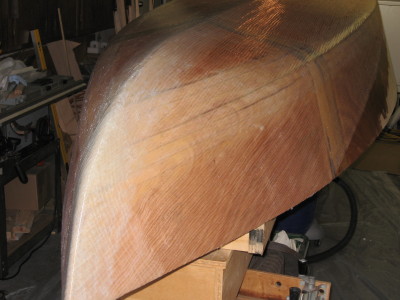
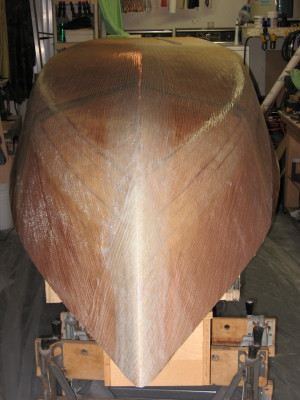
That's about all the advice I can think of
for this step. Here's some pictures of my marathon session:
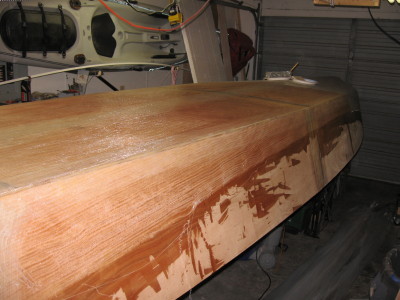
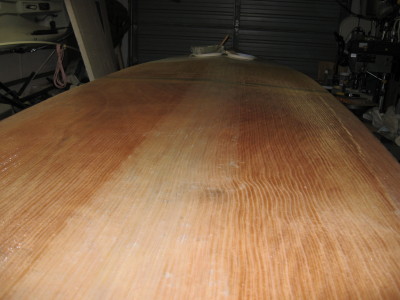
Unfortunately, I didn't have the time to
apply the peel ply like I had intended. Also, I didn't have time to apply the 6 oz cloth to the sides during this session.
This resulted in sanding the areas where the side fabric will overlap the bottom fabric. If you haven't sanded cured epoxy
& fiberglass before, then you'll be in for a treat - it's tough, slow work.