This is the 1st of several fiberglassing
steps on this boat. This is probably the easiest one also. Before beginning anything, make sure that all of your seams have
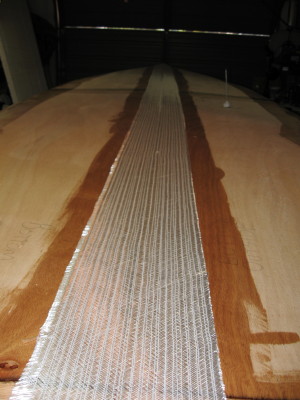
a 1/2" or larger radius - No Exceptions! I unrolled and cut the required 6" wide,
12 oz biaxial tape for all the seams. The keel, keel to transom, and side to transom intersections all get 2 layers of tape.
The chine seams get one layer. Basically you just lay the tape over the seam and at each end allow for about 3" or 4" of excess.
After I cut the tape necessary for each seam I rolled it back up and labeled it with a piece of LIGHTLY applied tape. Here's
some of the tape on the chine seams prior to adding epoxy...
I unrolled and cut the 50" wide, 12 oz, biaxial
fiberglass cloth and cut it to length - Just in case I got industrious and had enough time to do the entire bottom fiberglass
lamination schedule in one session, . I rolled 18'+ piece onto a cardboard tube and set it aside. Here's a shot of it on the
hull after I cut it to length.
The bottom cloth isn't wide enough to cover
the entire side of the boat and design doesn't require the side panels to be completely fiberglassed. The only requirement
is that the wide fabric cover or overlap the chine seam by 6". The best solution (but more expensive) would be to buy twice
as much cloth as listed in the Bill of Materials. I decided to compromise and use 50" wide 6 oz, biaxial cloth on the sides
to add a little extra strength, along with some abrasion, and impact protection. This extra cloth will add more weight, require
more fairing time, and obviously more epoxy and fairing compound than the original design. I decided to cut this cloth out while I had
the chance. I unrolled enough for the length of the boat and then split the cloth into two, 25" wide pieces - one piece per
side. I rolled those onto a cardboard tube and set aside for later. I also measured the 60" wide peel ply I had
on hand to apply to the cloth after laminating. (Click here to review the benefits of peel ply - Peel Ply).Now it's time to prepare for laminating
the fiberglass tape!
The first step is to mix up a small amount
of epoxy and precoat the seam areas on the plywood that will be covered with tape. I used a 2" chip brush to "paint' some
epoxy over the seam area and then I used a squeegee/spreader to evenly apply the epoxy across the wood surface. This needs
to sit for at least 20 minutes to allow the wood to absorb the epoxy. It's done to insure the wood doesn't absorb epoxy from
the cloth and create a resin starved area which would be a weak spot in the lamination.
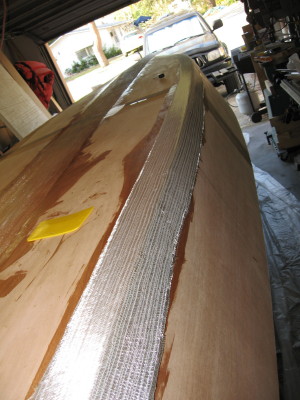
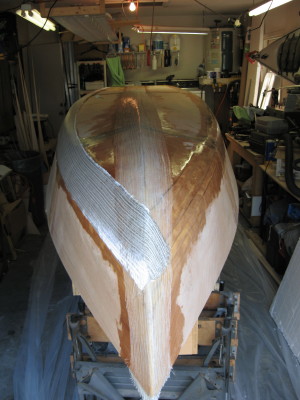
The next step is to roll out the tape over
the seams. I chose to do the keel seam 1st so I wouldn't have to reach over any wet chine edges to get access to the center
of the hull. Since I hadn't worked with this particular cloth before, I decided to just do one layer of tape to see how things
went. (When applying overlapping layers of tape or cloth you should offset the edges 1"+ to create a transition instead of
the abrupt edge you would get with two layers placed directly on top on each other.) Here's a shot of the keel tape just before
I started. The shot next to it shows the keel finished and a chine seam with dry tape.
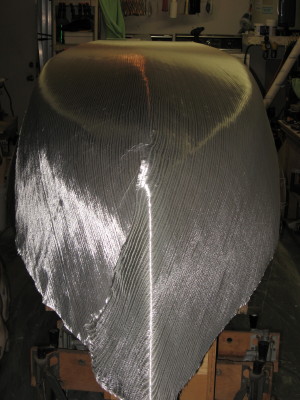
The technique I used for applying epoxy is
to saturate the cloth with excess epoxy to drive out any air and to make sure there is enough resin. Then I use a spreader
at a low angle to scrap or squeeze excess resin out of the cloth and move that excess towards a dry section. You have to play
around to get a feel for how much pressure you can apply without moving the cloth, but the excess resin needs to be removed
for the lamination to have optimum strength. Ideally, a good lamination should have a 50/50 resin to cloth ratio by weight
or less. At a certain point, too little resin will have a negative impact on strength as well. For laminating I generally mix about 8 oz
to 12 oz of mixed resin per batch using the slow speed hardener. I like the extra pot life of the slow hardener because it
gives you plenty of time to apply the resin, work it in to saturate the cloth, and then remove the excess. After the first
couple of batches you'll get a system down and then basically it's just working your way down the length of the hull, one
batch of resin at a time.
I was working by myself, so taping the entire
outside of the hull took me several hours since I had to stop after each batch a mix up another one.